One of the common issues beginner (and sometimes experienced) crocheters run into when making a blanket or afghan is curved edges. You’re crocheting along and suddenly the start of your blanket looks more like a “rainbow” than a nice straight rectangle. If it happens the most important thing is not to panic. There are several options to fix crochet blanket curving and tricks to prevent it from happening to your project in the first place.
So how do you fix crochet blanket curving? For blankets and any rectangular project that has started to curve there are 4 options to fix it: (1) blocking, (2) ripping back to a previous row, (3) adding a border to the project, (4) continue crocheting and add it to a design element. Before you determine which option is best to fix your project, it is important to know how each option might change the final outcome of the project.
Option 1: Blocking
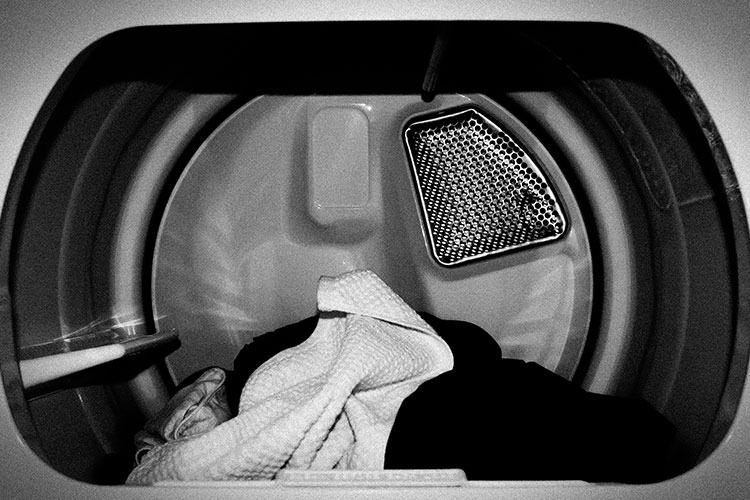
One option to fix blanket curving is to try blocking the project. Blocking a project is typically done with a finished project and involves stretching it to the final desired shape. There are several techniques to block a crochet project, but the basic process is to wet the project (by washing, misting or steaming) and then stretching the project tightly into the desired shape. Once stretched, the project is pinned down and then allowed to dry completely. Depending on the type of yarn and the amount of stretching required, when the project is dry it maintains the size and shape of the blocking.
Blocking a curved project is likely only an option when the amount of curving is limited or when all the edges of the curved project are curling. This can happen with some types of specialty yarns or patterns like granny squares where uniformity in the edges of the project is imperative. Unfortunately, it will not likely address issues with tension, hook size or irregular numbers of stitches. Curving that occurs from these problems requires a different solution.
Option 2: Ripping Back To A Previous Row
While ripping or “frogging” is often regarded as the least preferred option to fix a project, in the case of fixing crochet blanket curving it may be the best option. To rip a project, simply identify the last point in the project where the stitches appear to be correctly crochet and then undo the stitches to that point. Once you’ve ‘ripped back’, fix the error and then continue crocheting the pattern as written.
The downside to ripping back is that it takes time and effort to complete the same part of a project for a second time. It can be especially frustrating for beginners who may need to rip multiple times before a project is finished. Experienced crocheters treat ripping a project to fix errors as part of the process and acknowledge that sometimes it may just be the best choice. Besides, practicing the tension and skills will only make you a stronger crocheter later!
Option 3: Add A Border to the Project
If you are very near the end of your blanket before realizing the shape is curved or if the curving is only minor, it may be an option to add a border to the project. Using a contrasting color of yarn, the same yarn in a different crochet stitch, or a fabric swatch, consider adding a border to address the curving. In this way, you don’t need to spend time blocking or ripping back but can still end up with uniform edges.
See below for tips on adding a crochet border, but note that in order to fix curved edges, you may need to adjust the row size for some of the rows in your border. In order to get a straight, even, edge around the blanket it may be necessary to add a stitch or two every few stitches to the shortest side of the curved blanket. Go slow and plan your border carefully before you begin to create the best final product for your curved edges.
Option 4: Keep Crocheting and Make it A Design Element
If you determine that your blanket is curved because of irregularities in the lengths of your crochet rows, it may be possible to replicate the curve in a mindful way for the rest of the blanket. Rather than an error, the curving becomes a design element adding interest to your project.
To create this look, determine how many stitches were in the curved rows and then attempt to replicate that. You may choose to adjust the pattern and attempt to create a curve in the blanket pattern back the other direction. By evenly decreasing the rows and increasing the rows across the blanket you may end up with a nice ‘waved’ look to the edges of the blanket without any major issues.
This is likely only an option if you are early into your crocheted blanket. It would look odd if the curves were only on half of the blanket. It also is likely only possible if the curved edges are related to inconsistently increasing or decreasing the number of stitches in the rows. It is unlikely to be a good solution for projects where the curves were caused by irregular tension or too tight of a foundation row.
Why Does A Crochet Pattern Start To Curve in the First Place?
There are a few reasons your crochet project may have started to curve in the first place. Deciding what occurred may help you determine which of the above choices will be the best one to address the problem.
Foundation Row Tension
One common reason crochet projects may begin to curve is because the foundation chain (where you started the project) was created too tightly. If the tension on this first row is tighter than the other rows, the project will appear to widen as your tension begins to loosen in subsequent rows. Visually you can see this happen if your project forms a rainbow shape where the first rows are very tight and the tension slowly begins to loosen.
Unfortunately, there aren’t many options to fix this without ripping back to the beginning and starting the foundation row over again. Depending on the tightness of the foundation row, blocking may be an effective way to loosen up some of the stitches. But for projects that are near the beginning, it’s best to start over.
When you do begin new projects, always keep in mind that uniform tension (not too tight, not too loose) is best for the foundation row. If you regularly struggle with too tight of a foundation row, you may need to use a hook that is one or two sizes larger than the recommended to create your foundation chain. Creating the first row or two with the larger hook before decreasing back to the recommended hook is a good way to ensure that the row will not curve from being too tightly constructed. You can also try a chainless foundation stitch (see below) to form your initial row.
Changing Yarns
Another reason you might experience crochet blanket curving is when you change yarns. If your curving occurs a few rows after you change the color or weight of yarns, you may need to adjust the hook size. Different yarns require different hook size to maintain the same uniform tension. If you experience curving after you change yarns, rip back to the point where the yarns switch and then adjust your hook size. It’s best to create a separate gauge swatch with the yarn switch in the middle to determine which hook size will result in the most even rows of stitches.
Keep your stitch count even for each row.
Another common reason rows may begin to curve is because stitches are added to the row. It’s easy to get distracted or forget the total number of stitches in a row, especially for complex sets of stitches. Accidentally repeating a set of stitches or adding stitches to each row can slowly result in the edges of your project growing. While this may end up in more of a triangle shape rather than a rainbow, it still creates irregularities.
If you find yourself regularly adding stitches to rows, it may be helpful to use stitch markers while you crochet. These will help you keep track of the total number of stitches in your row. You can also mark the last stitch in each row to make sure you always accurately turn the row at the correct stitch.
Place the first and last stitch in the correct spot in each row.
Another reason the edges of your crochet blanket may turn out irregularly is if you place your first and last stitches in your rows incorrectly (or inconsistently). At the beginning of a project, determine if you intend to count the last stitch of a row as a stitch or if you will not count it as a stitch. Either way you decide, you must be consistent or the rows will be uneven or begin to curve.
For each row, it’s also important to be consistent about where you place the first stitch. By inserting the hook into the wrong part of the chain on the first stitch you may inadvertently be adding a stitch at the beginning of each row. If you stitch all the way to the end, over time your blanket edges will begin to lengthen and you’ll be left with a blanket that is oblong rather than perfectly square.
Always keep your stitch count even for each row (see #3 about ways to keep track of stitch count) and place the first and last stitch in the correct spot to avoid issues with projects that ‘grow’ from too many stitches in the rows.
Changing Hooks In the Middle of The Project
Although it may be necessary to use a slightly larger hook to create the best foundation tension, you should always avoid changing hooks in the middle of crocheting a blanket. Crochet hooks can vary dramatically in size between manufacturers, even when the same size may be listed on the hooks. If you set aside a blanket and then come back to it later with a different hook (even one that is the same size) you are likely to see differences in the tension and the potential for curving.
To keep the most uniform, even tension throughout your project, always use the same hook once you begin the body area of your blanket.
Remember, It’s Part of the Process
The most important suggestion for all of the tips and tricks listed here is to remember that learning to crochet is a process. Mistakes happen to even the most experienced crocheters. Knowing how to fix them (and prevent them in the future) can be helpful. But the most important thing is to keep going. The biggest mistake in crochet is to stop a project in the middle because you aren’t sure how to fix it. It may take a few opportunities for you to determine the cause, but in the end, you’ll be a stronger crocheter and be able to create better projects if you keep practicing!
Related Questions

What is a chainless foundation stitch?
For people that have difficulty creating a foundation row with even tension or those that find it difficult to go back and stitch into a foundation chain, a chainless foundation stitch may be an option to start projects. The chainless foundation stitch is a technique to create the foundation row and chain the 1st row at the same time. The chainless foundation stitch can be used with double crochet or with single, half double, and some specialty stitches.
To work the chainless foundation stitch, follow these steps:
- Start with a simple slip knot on your hook.
- Chain 2.
- Insert your hook into the top two loops of the second chain from the hook.
- Yarn over and draw the loop up.
- Yarn over and draw through the first loop on the hook.
- Yarn over again and draw through the two remaining loops. This creates the double crochet.
- Repeat it in the next single chain (the foundation row) and the loop behind it.
The chainless foundation stitch can also be used for any project like socks or sweaters where it’s important to have an edge with some ‘stretch.’
How do you add a border to a crochet blanket?
As noted above, adding a border to a crocheted blanket is a good way to hide small errors and create a nice, professionally-looking edge on a project. In general, if your crocheted blanket is one solid color, use that same yarn to create the border. If your crochet blanket has a color-changing pattern, select the color that will be the least conspicuous. Borders are meant to hide errors, not draw attention to them!
If using the same color yarn, do not fasten off. Just continue with a single crochet row first, and work up the side of the stitch instead of in the top or bottom of the stitch. Make sure that you place the stitches consistently as possible as you work around the blanket (to avoid holes or missed stitches).
When you arrive at a corner, patterns will typically tell you how many stitches to work in the corner. Depending on the pattern you may need to add 2-3 stitches in each corner to get a nice even tension around the corner. If the stitches are “pulling” the tension is too tight and you need to add 1 or 2 more. If the stitches are ‘sagging’ in the corners, you’ve added too many and need to reduce them.
After adding the single crochet row, it’s then possible to add additional decorative rows to create the border. Options include a crab stitch or a repeating shell stitch. Remember that a slip stitch is usually used to connect the start and end of your starter row and then stitches are worked ‘in the round’ for the rest of the border. Use a stick marker to carefully mark where your two rows are joined together.
Why is a crochet project twisting?
Occasionally the edge of a project will twist in a circle while it’s being crocheted. This can occur for many of the same reasons that a project will ‘curve’ including tension, hook size, or incorrect stitch count. Use the same problem-solving process above to determine the issue and the best strategy to resolve it. If your project begins to twist in a circle, first try blocking the yarn. If the rows are all the same length and the tension is similar across all the rows, it may just need to be ‘flattened’ out. If your rows are different lengths, likely you’ll need to rip back and more carefully count the rows. If the tension in your rows is different, rip back and work more carefully with uniform tension.