Even the most experienced crocheters sometimes wind up with a missed stitch or another mistake. While no one likes to make mistakes, they are bound to happen. The important thing to know are the tips to fix a missed stitch and other common errors in crochet when they happen (and to know the tricks to avoid mistakes in the first place!)
So what is the easiest way to fix a missed stitch in crochet? There are three options: go back and fix it, ignore it, or add it into a design element. Each of the options have pro’s and con’s that will impact your project. Knowing the options can help you decide what is the best choice for you.
Option 1: Go Back to The Mistake and Fix It.
The first option is commonly called “ripping back” or “frogging.” In this method, you unknot the stitches back the point where the missed stitch occurred, fix the stitch, and then continue crocheting. This is the best option to ensure your final project has the perfect size and shape. It’s also the best option for complex patterns, and projects like lace or amigurumi where tight, uniform stitches are important.
Unfortunately, ripping back can also be very frustrating, especially for beginning crocheters. Continuing to go back to fix errors slows down the speed of crocheting since you have to keep repeating the same stitches on the project. It can also be hard on specialty yarns and exotic fibers to be unknotted and restitched. Depending on the location of missed stitch (e.g. end of the row, near a border, hidden part of the project) you may decide to try a different option than going back to fix the stitch.
Option 2: Ignore it.
It may seem odd to say, but one option when you miss a stitch in a crochet project is just to ignore it and keep right on crocheting. Unlike knitting where missed stitches can cause a project to unravel, missed stitches in crochet aren’t always a problem. With some types of crochet stitches (especially those with large open spaces), a missed stitch here and there may not be even noticeable in the final project.
If you discover a missed stitch, step back from the project and take a look where the error was. If it’s not likely to change the eventual size or shape of the project, and it’s not in a conspicuous space, keep on crocheting! Sometimes what makes handmade projects special are the unique features and flaws.
Option 3: Add It In As A Design Element
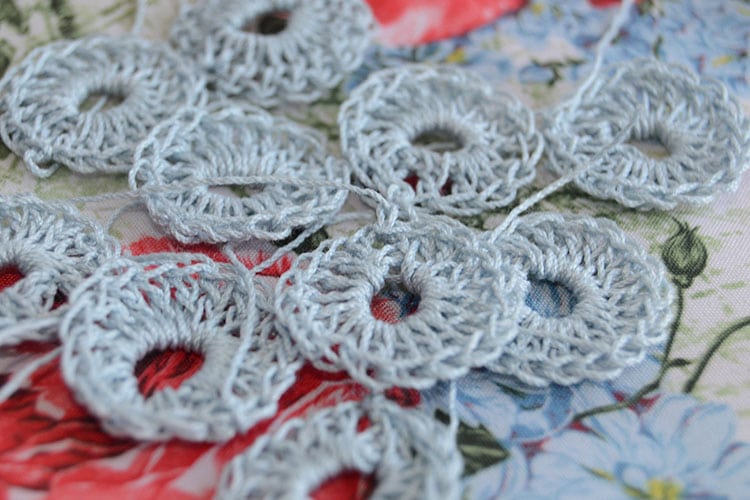
In some cases, a missed stitch might result in a unique shape or hole in the crochet pattern. You may decide once you notice the missed stitch that your new stitch pattern is better than the old one. If you like the look of the missed stitch, instead of ripping back to fix it, continue with the missed stitch in upcoming rows as a design element. What was a ‘mistake’ might just be an improvement on the project!
In all of these cases, the best way to problem-solve a missed stitch is to identify the mistake early. The sooner you recognize a missed stitch or other error, the easier it is to make a choice about how to fix it. If you recognize a missed stitch just a few stitches or by the end of the current row, it’s much less time consuming just to rip back to that point to fix it.
It’s helpful for beginner crocheters to learn the common mistakes in crochet, strategies to fix them, and ways to avoid making those mistakes in the first place.
What are the other common mistakes in crochet?
The project keeps getting larger/wider.
Every crocheter makes this mistake at least once. You get to the end of a few rows and realize that your simple square pattern now has a wider bottom and looks more like a triangle. Projects that continue getting larger or wider happens from not properly counting stitches to the end of a row (and subsequently working more stitches in a row than are needed.)
Unfortunately, the only way to fix this mistake is to rip back to the last row you crochet with the correct number of stitches and then carry on. The better way is to not make this mistake in the first place. To avoid it, carefully count stitches as you create each row. When you reach the same number of stitches in your second row as your first, stop, turn, and begin again. Be sure to start your next row in the correct stitch (single crochet starts in the first stitch, double crochet starts in the second stitch, etc.) and count as you go.
The project keeps getting smaller/narrower.
Just like the project that continues to balloon outward, it’s also possible to experience the ‘pine tree’ effect where your project continues to get narrower and narrower in a triangle shape. This happens from creating too few stitches in each row or continuing to miss multiple stitches in a row.
Same as projects that grow wider, if you catch the mistake early you can pick up the stitch a row or so later in the pattern. Any farther than that and unfortunately, the only way to go back and fix this mistake is to rip back to the last row that was the correct size and begin crocheting from that point again. To avoid the dreaded ‘shrinking project’ be sure to always count stitches as you create your row and be careful to start your next row in the correct stitch.
Crocheting only in the front loop
This is a common mistake, especially when beginning crocheters move from single one-stitch projects like scarves into more complex projects. It happens when you gather only the front stitch to loop for your next stitch rather than picking up both the front and the back loops of each stitch. While this doesn’t impact simple projects, it will cause havoc later when you begin to experiment with more advanced projects.
The easiest way to identify the error is if the front and back of your crochet project looks different. The project may also be larger than you planned. If it happens, you may choose to complete a simple project without adjusting it. For a complex project, it’s best to start over (if the full project is done only with the front loop) or rip back to the last correct row and begin again.
Forgetting which row of the pattern you’re crocheting.
I like to call this mistake ‘distracted driving’ your crochet hook. It happens most often with crochet patterns that require you to repeat a set of rows to create a complex stitch pattern (e.g. Rows 1-5 each have a different pattern of stitches, then repeat those five rows over and over again to form the project). In these situations, if you forget which row of the pattern you’re crocheting it can impact the final outcome.
Stitching the same row twice or forgetting to stitch a row in a sequence of rows can both result in stitch patterns that don’t look quite right. It also means to get the best-finished product you’ll either have to keep repeating the same mistake again for the rest of the pattern or rip back to the mistake and crochet it again.
When you’ve corrected the mistake, it’s best to use a stitch counter or a row counter going forward to help you keep track of where you are in the pattern. If you have to set a project aside for a period of time, jot down where you are in the pattern and safety pin the paper to the project. That way you can pick right back up where you left off when you return.
Using the wrong hook size.
While sometimes this might be an intentional switch for a pattern, another common mistake for beginning crocheters is to select the wrong hook size for a particular pattern. Often it happens when you decide to use a different yarn than the pattern calls for, or when a beginner crocheter might not own particular hook size in their kit and decides to sub another size rather than buy the recommended size.
Changing the hook size can change the final look of a project in many ways. Upsizing and downsizing hooks can result in projects that are larger or smaller than intended. Using too large or too small of a hook can also slow down the speed of your crocheting.
If you think you may need to adjust hook size, always create a gauge swatch first. This can help you predict how the gauge of the finished project might be different than the pattern and make design adjustments accordingly.
Mixing up crochet terms.
Just like hook sizes can vary depending on the country where the crochet hook was made, so can the terminology used in a crochet pattern. Sometimes the same stitches can be abbreviated in very different ways depending on where the pattern was manufactured. For example, a slip stitch is abbreviated “ss” in both English and American patterns. However, a single crochet (sc) in US terms is actually a double crochet (dc) in a UK pattern. If you continue to carefully complete a pattern but the size or shape seems off, double check what terms the pattern uses and make sure you’re converting appropriately.
Good quality patterns will note whether or not the pattern is written in UK crochet terms or US terms. The terms should also be consistent throughout, so once you correctly identify how the pattern is written you should be able to proceed accordingly. To avoid this mistake, it’s best to always, always, always read the pattern and make sure you understand each element before you begin.
Not leaving enough yarn to properly bind off
There’s another point of panic for beginning crocheters when you arrive near the end of a project only to find you don’t have enough yarn to properly bind off the finished project. While there are options to help make yarn stretch further, it’s important to make a decision about binding off well before it’s time to do so.
If you find yourself without enough yarn to bind off the project in the right place you have a few options to fix the mistake. The first option is to go back to the yarn store and find enough to bind off where the pattern tells you to do so. Not ideal, but sometimes it might be the only option to have a professional looking project. Another option is to rip back a few rows of the pattern and then using that yarn to finish the project early. The project may be slightly smaller than recommended, but it may be faster or more affordable than tying on another skein of yarn.
It’s also important to not just leave enough yarn to bind off the completed row, but to also leave at least a 5-6 inch tail of yarn to weave into the project. This is your insurance policy that the project wont later come apart and gives the project a nice professional looking finish. Too short of a tail for weaving will make the process difficult and may leave a tiny piece hanging.
Crocheting stitches too tightly
Another tricky spot some beginning crocheters (or anyone having a bad day!) run into is creating crochet stitches too tightly. Having uniform, consistent tension is something that develops with more experience crocheting. If you constantly find yourself fighting to work the stitches in your next row because it’s too difficult to insert the hook in the stitch, you’re likely working your stitches too tightly. Loosen up your grip up the hook and the yarn, relax and try to keep stitches tight enough to be secure and uniform, but not so tight that the stitches do not move freely when you insert the hook.
Another good indication your crochet stitches are too tight? Hand pain. If you’re experiencing cramping during crocheting or aching pains a few hours after you finish a crafting session, you may be putting too much tension on the yarn.
Not finishing the project
In all of the situations above, it’s important to note that mistakes happen. Even the most experienced and fastest crocheters run into mistakes, have to rip back to correct them, and begin again. The biggest mistake in crochet is to give up on a project.
Leaving a project behind because you’ve made an error is the worst way to experience the relaxation and fun of crocheting. Take a break for a few minutes and then come back to the project. You may find the mistake was easier to fix than you thought. If you’re still unsure how to fix it, call a friend or search online for a solution. If you’re still unsure, bring your project and pattern to a local yarn store where a staff person may be able to help you.
Whatever you do, don’t create a large pile of unfinished projects in your yarn stash. Those ‘unwanted’ misfits might just be your favorite projects if you just keep going!
Related Questions

Is it harder to fix mistakes in crochet or knitting?
The basic technique for fixing mistakes in crochet and knitting is the same. In both techniques you need to rip back to the point where the mistake was made, correct it, and carry on. While neither is “easier” to fix than the other, there are differences in how obvious mistakes are and how imperative it is to fix them. In knitted fabrics, missed stitches can cause the yarn to unravel in the middle of the project and deteriorate the look of the project over time. It’s much more critical to fix mistakes because the integrity of the full project is at risk.
As mentioned above, often crochet mistakes don’t require any fixing at all. When a stitch is crocheted it’s no longer ‘live’ like in knitted projects, so there’s little or no chance that a mistake will unravel when a stitch is missed. Crochet leaves more options to decide whether or not a mistake is necessary to fix.
What are the best tools to keep track of crochet stitches?
In many of the above strategies to avoid mistakes, the importance of keeping track of crochet stitches is important to success. Given how important it is to count stitches (and how easily we can all forget!) there are tools available to help crocheters keep track of where they are in a pattern. Crochet stitch markers and stitch counters are two tools that help with counting stitches in a project.
Crochet stitch markers are used to indicate an individual stitch in a pattern (or mark the end of a row). These are helpful when there are a large number of stitches in a row to count or when crocheting in the round. Crochet stitch counters are used to count each row as it is completed. These are helpful for projects that have sets of repeating rows or a large number of total rows to count.