Have you ever wondered if it’s possible to crochet without a crochet hook? A few years ago, finger crochet—a technique to create unique crochet projects without a hook—roared onto the DIY scene. Today there are tons of patterns and blog posts about how great it is to crochet without a hook.
We’re joining in today to post a tutorial to show you exactly how to crochet without a crochet hook. This step-by-step tutorial can be used for all finger crochet projects. By the end you’ll have the answers to these questions:
- What is finger crochet?
- Why would you choose to finger crochet instead of crochet with a hook?
- What are the steps to finger crochet a project?
- What yarns are best for finger crochet?
- What patterns are best for finger crochet?
- How do I adapt my favorite crochet pattern for finger crochet?
It’s everything you need to help you master a new technique and create some gorgeous projects.
What exactly is finger crochet?
Finger crochet is a method to create regular crochet stitches by only using your fingers. No hook needed here! Some experienced crocheters say that learning to finger crochet is a bit easier than learning to crochet with a hook. There’s less coordination needed than having to hold a hook and yarn and to get the hook in the right spot for each stitch. It’s a popular technique for people just learning about yarn arts and for experienced crocheters looking for a new way to expand their hobby.
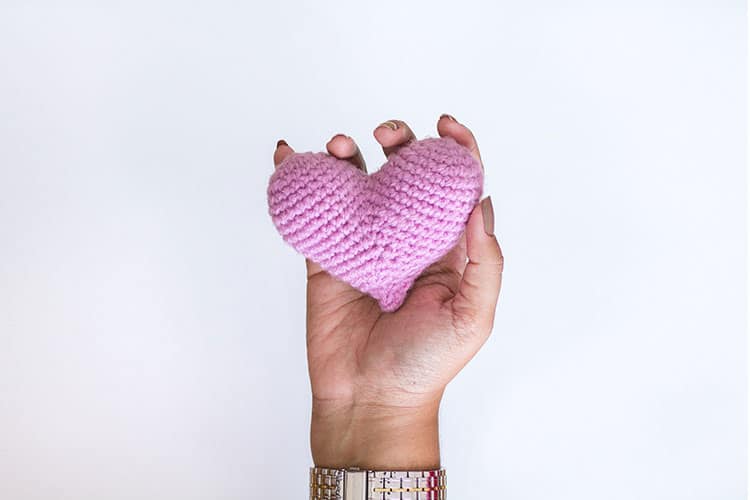
Some other highlights of finger crochet include how versatile it is as a DIY technique. Finger crochet projects have the same texture and feel as their hook-crocheted counterparts. Finger crochet projects are typically worked with soft, bulky yarns and use patterns with simple crochet stitches. All of this and more can be found in the tutorial below.
Why would you choose finger crochet instead of a hook?
Many people ask this question, especially if they already know how to crochet with a hook. Let’s dive into some of the reasons you might decide that crocheting without a hook is not only a great technique to learn, but also some scenarios where it might be better than using a hook.
Learning a new DIY skill – If you’ve been knitting, crocheting or both for some time, it may be time for you to freshen up your hobby and learn a new DIY skill. There are so many different ways you can mix and match yarns to create unique projects, why not learn a new way to mix and match stitches? Learning to finger crochet can inspire you to make something new and to have a huge sense of accomplishment when you’ve mastered the new technique.
You don’t own a crochet hook – Although they are easy to find and affordable, you may not have a crochet hook in your crafting toolbox yet. If you’re a dedicated knitter and new to crochet, or you would like to give crochet a try before you commit to spending cash on a new hobby, then finger crochet is a good choice to dip your hands into a new DIY technique.
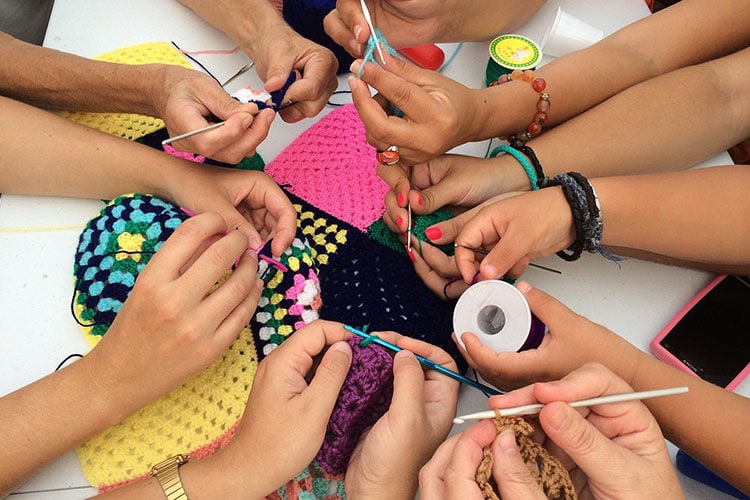
When you forgot a crochet hook – It’s happened to everyone. You arrive at your crafting circle or your long-weekend at the beach house and sit down for some relaxing crochet time. When you pull out the yarn and get ready to start that new project, you discover somehow you’ve either lost or forgotten to pack a crochet hook.
While there are options to craft a make-shift crochet hook in a pinch (see the related questions below), finger crochet is a good choice for those times when you find yourself without a crochet hook. Many patterns can be adapted in a pinch for finger crochet, so having it in your toolbox of skills is a good option if you find yourself without a hook.
When you can’t pack a hook – While many domestic airlines now allow crochet hooks on board an airplane, there are some situations where you might find yourself unable to pack a crochet hook. Regulations on international flights differ by country and by airline, meaning you might not always be able to pack a crochet hook with you on a long flight. In that case, having a finger crochet project is a good alternative to still get some relaxing crafting time.
The same applies to other situations where crochet hooks might be banned. For safety reasons, many psychiatric wards, prisons, and courtrooms restrict materials like crochet hooks. They don’t typically restrict yarn though, so there’s no reason not to pack a finger crochet project if you need to fill some downtime in a location where hooks are not allowed.
If you’ve tried to learn crochet in the past – There are some books and articles that suggest that learning to finger crochet may be easier than learning to crochet with a hook. If you’ve tried to learn crochet in the past but haven’t had much luck coordinating the stitches, it can be useful to try out finger crochet as a bridge towards later learning to crochet. Finger crochet stitches tend to be looser and it can be a helpful way to learn how to keep good yarn tension throughout a project.
Teaching a child – If you have a child or grandchild who has watched you crochet and is anxious to learn, finger crochet may be a good technique to teach. As fine motor skills begin to develop, learning the coordination to use a hook can be a bit of a stretch. This is especially true for children under the age of 7. Finger crochet is a good alternative, not only to help sharpen those fine motor skills but also to encourage crafting as a hobby and skill at a young age.
For rehabilitation skills – Similarly, finger crochet can be of benefit to anyone who might need to strengthen fine motor skills. It can be a popular activity in rehabilitation centers for individuals who need to rebuild those hand and motor coordination skills after accidents or injuries. Physical therapists may recommend finger crochet for the rehabilitation of fingers, wrists, and hands.
Step by Step Guide to Crocheting Without A Hook
If you’ve decided to give finger crochet a try, below you will find the seven steps needed to create a basic finger crochet project. The instructions are generally written for a right-handed crocheter, but can easily be adapted for the left hand. It’s also made using a single crochet stitch, but can be used with other basic crochet stitches like double crochet and half double crochet.
Step One: Making a Knot
As with all crochet projects, the first place you’ll start is with a slip knot. While it’s technically not counted as a stitch in the first row of the project, it is the foundation from which all projects begin. To create a slip knot, pinch the yarn approximately 6-8” from the yarn ball. Cross the left side of the yarn over the right side, making a “pretzel” shape. Pull the yarn through the loop or pretzel to form a knot. You should have a loose tail of yarn about 4-6” in length.
Step Two: Creating a Chain
The next step in finger crocheting (and crocheting with a hook) is to create the initial chain. This is where all the other stitches in your project will build from. The length of your chain is determined by your project and should be abbreviated by (ch).
To create a foundation chain in finger crochet, simply place the loop of the slip knot over the pointer finger of your right hand. Using your pointer finger as a hook, grab and pinch the working yarn and pull it through the slip knot loop. Let go of the yarn (you’ll have a new loop left on your finger). This is your first chain.
Repeat the same steps (pinch yarn, pull through the loop, release the yarn to form a new loop) to create the chain to the desired length.
Step Three: Crochet the First Row
When you’ve created your chain to the length outlined in the pattern, it’s time to start the first row. At the end of the chain, the last loop should remain on your right pointer finger. While continuing to use your right pointer finger as the ‘hook’, place the yarn over your finger front to back and insert your finger into the third stitch from the one on your finger. There will now be two loops on your finger.
Create a single crochet stitch by pinching the yarn between your finger and thumb and pulling it through the first loop. Yarn over again front to back and pull the yarn through the remaining loops on your finger. Repeat this step, inserting your finger into the center of each of the chains on your foundation row.
Step 4: Turning & Making Second Row
When you reach the end of the second row, you’ll need to create a ‘turning chain’ which allows you to turn the project and start working crochet stitches back the other direction. It’s important that you create a turning chain, otherwise, your rows will gradually become uneven and your project will be misshapen.
To create a turning chain, simply place the yarn on your right pointer finger, yarn over and pull through like you did for the initial foundation chains. Then remove your finger and turn your work. Remember to turn your work the same direction (clockwise or counter-clockwise) each time. Place your pointer finger back in the loop and begin the next row.
Step 5: Build the Project
Step 4 forms the basis for the rest of your crochet project. Build the project row-by-row by crocheting across the row, creating a turning chain, turning the project and working stitches back across the rest of the row.
Step 6: Fasten off the Project
When you reach the last row of your pattern, and you’re ready to finish the project, you’ll want to secure the final loop. You’ll want to fasten off the yarn ball so that your finished fabric does not unravel. To do so, cut the yarn approximately 8” from the last stitch on your finger. Then, pinch the yarn tail between your finger and thumb and draw it through the loop on your finger. Remove your finger and pull on the tail to tighten into a firm knot.
Step 7: Weave in Tail Ends
The final step in your finger crochet project is to weave in the tail end that is loose after you’ve fastened off the project and the tail end that’s attached to your foundation row. To do so, you can use a tapestry or yarn needle (a needle with a large enough eye to thread through your yarn) or you can use your finger. Secure the yarn and then run it under and over every other stitch in the second to last row of your crochet project. Weaving it under and over will help prevent the project from unraveling and from the loose end of yarn fraying if the project is heavily used.
These are the seven basic steps to make a finger crochet project. They can be adapted to suit many different crochet stitches, yarns, and patterns to create an infinite number of unique projects. Below you’ll find more tips on how to make the most professional-looking projects without a crochet hook.
Best Stitches for Finger Crochet
While technically, you should be able to finger crochet any type of crochet stitch that you can also use with a hook. You’re simply substituting your pointer finger as the crochet hook. That being said, there are some crochet stitches that work better than others for finger crochet.
Finger crochet works best with shorter stitches (single crochet, double crochet, half double crochet) and their variations. Your finger is only so large, and anyone with smaller hands may find it difficult to crochet taller stitches like double and triple treble crochet. These stitches require you to yarn over multiple times and there’s not enough length on your finger to hold the stitches. It also doesn’t work for Tunisian crochet or Knooking where you need to hold stitches on the hook while working across the rows.
It’s also best to avoid textured stitches like bobbles and post stitches. These are more complex stitches that some crocheters find difficult even with a hook. Avoid using patterns that have these stitches included.
Best Yarns for Finger Crochet
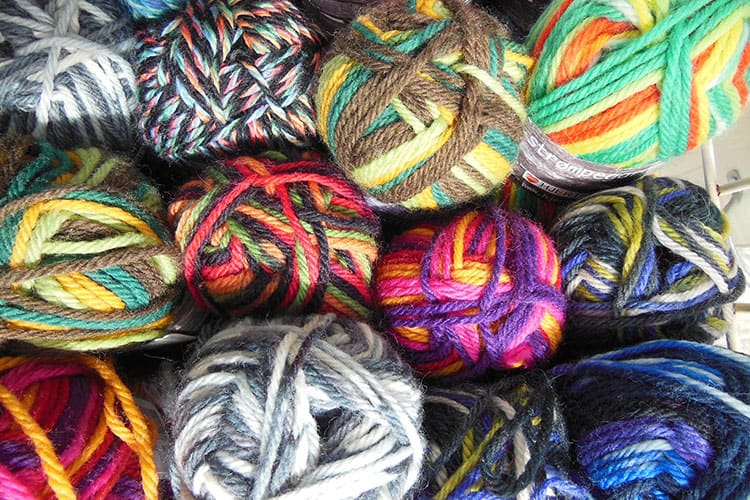
There are two common options for choosing yarns for finger crochet projects. The first is to use a single strand of a bulky or super bulky yarn. The second is to use multiple strands of finer yarns that are stitched together as if they were one strand. Depending on the type of project you are working, there are advantages and disadvantages to each.
Finger Crochet with Bulky Weight Yarn – Bulky weight or super bulky weight yarns are the easiest to use when you first begin finger crochet projects. Using larger weight yarns is also one of the reasons that finger crochet has become the most popular. The projects work up very quickly and can be a fun way to test the technique.
Bulky weight yarns will be listed as Weights #5 and larger. They are the thickest yarns available and are used with crochet hooks J or larger. Popular choices include chunky knits, fabric yarns, roving, and t-shirt yarns.
Finger Crochet with Multiple Strands – In general, finger crochet does not work well with fine yarns, like those meant for baby projects and lace. It’s possible to use these, but not practical. Instead, if you’d like to use a particular lightweight yarn or specialty yarn (with sequence, metal strands, etc.) it’s possible to hold four to five strands of finer yarns together to create one bulkier strand for finger crochet. You could also use one strand of medium weight yarn paired with one or two strands of finer, specialty yarns. By combining yarn strands you can create a unique color and texture variations not possible with a single strand of bulky yarn.
Recycled Materials – While less common than yarn, there are also patterns and projects available on craft websites to finger crochet with recycled materials. Without a hook in the way, materials like newspaper, plastic bags, and VHS tape ribbon can easily be crocheted into unique (and eco-friendly!) projects.
Best Patterns for Finger Crochet
As mentioned above, there are some projects that are better suited for finger crochet than others. Crochet patterns with tall stitches are likely not the best choices for finger crochet projects. It’s too difficult to place multiple loops or carry stitches on your finger for these types of projects. Similarly, it’s better to choose patterns that create one continuous piece of crocheted fabric rather than items with seams (sweaters, stuffed animals, etc.) or parts that need a lot of shaping (socks, mittens, etc.)
While it’s not impossible to re-create these items using finger crochet, without a lot of experience it can be difficult to accurately join the stitches together to create an even, professional-looking project. Instead, we recommend choosing one of the following project types for your first few finger crochet projects.
Bracelets – Finger crochet bracelets are a great way to practice Step 1 and Step 2 of the procedure above. Start by making a slip knot and then finger crochet a foundation chain to the desired length to fit around your wrist. Leave enough tail to fasten off (Step 6) and then tie in a loop to form the bracelet.
Scarves, Cowls, and Infinity Scarves – Scarves are one of the most popular projects to learn the basic steps of finger crochet. Start by trying chain scarves, which are made entirely from chain stitches looped over and over again to form the scarf. Then move on to simple crochet scares, typically made from short rows with 12 stitches or less. These scarves can be finger crocheted in less than an hour once you get the steps down. After that, move into cowls and infinity scarves which are either finger crocheted in repeated rounds or worked in long rows and then stitched together along a seam at the end.
Scarves are also a helpful way to test out different finger crochet stitches. You can start with single crochet, then. move to double crochet and half double crochet stitches. They are the simplest way to practice stitches without a hook.
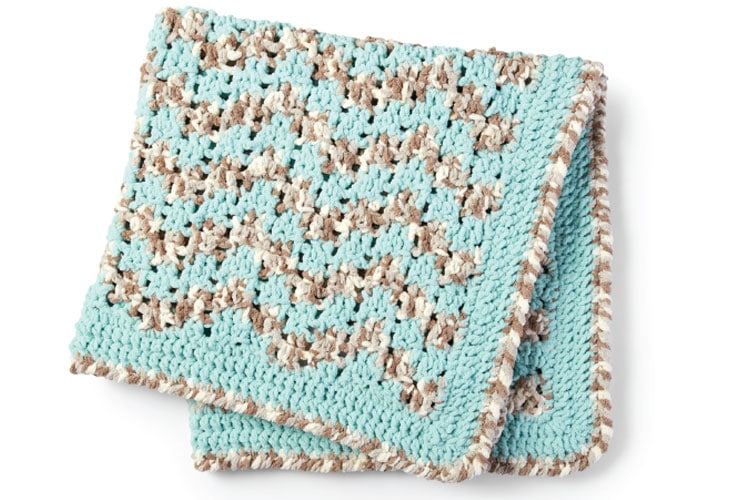
Blankets – If you’re ready for a longer-term finger crochet project, next consider making a blanket. Using super bulky or jumbo weight yarns, finger crochet blankets can be finished in just a few hours and make terrific cold-weather gifts for friends and family. When finished you can try extra techniques like adding tassels or using a hook to crochet on a professional-looking border.
Pillows – Square up your scarf rows and make a pillow cover for your next finger crochet project. Pillow covers can be crocheted in two pieces and then stitched together around the edges or they can be stitched as a sleeve, so only one seam is necessary.
Tote Bags – If you’ve mastered pillow patterns, another similar project to finger crochet are tote bags. Simply work in a round, or work two panels and then add a handle. Tote bags are typically finger crocheted with yarns and stitches that have a bit of stretch (t-shirt yarn, jute, or twine). These projects can create a sturdy market bag for your next shopping trip that will definitely turn heads.
Baskets – Another fun DIY project to try finger crocheting are baskets. Often times these projects are made from alternative fibers like jute, fabric yarn, or hemp fibers. They typically use one crochet stitch and are formed in the round, working the bottom base and then forming the sides of the bag or basket.
Pet Toys – If you’re interested in crocheting something for a furry friend, you might consider finger crocheting a rag rope or chew toy. Especially when made from recycled fibers like towels or t-shirts, these can be great projects to practice your technique. Fun for you and your four-legged friend!
How to adapt a regular crochet pattern for finger crochet
If you have a favorite pattern that you’d like to try crocheting without a hook, it’s important to keep a few things in mind before you adapt it for finger crochet. Ask yourself these questions to determine if it’s a good pattern to convert:
- Does the pattern call for simple stitches like single, double or half double crochet?
- Does it use a crochet hook sized J, K, or higher?
- Does it call for bulky weight yarn or can I use multiple strands?
- Is gauge less important to the finished product? (See below).
If you can answer yes to these questions, it’s likely that your crochet pattern will be a good choice for finger crochet. If that’s the case, then simply follow the same pattern instructions using the step-by-step tutorial above to convert the pattern.
A Note About Gauge
Traditional crochet projects recommend that you first begin by checking your gauge. This is to make sure that the number of stitches in your rows matches the number of stitches in the rows of the pattern. If it is larger or smaller, you may need to adjust your hook size so the project comes out similar in size. Gauge is especially important when crocheting garments or tightly fitted accessories like hats and socks.
In finger crochet projects, it can be more difficult to establish a gauge than projects crocheted with a hook. As you go along, you can improve your tension by creating more consistent stitches and pulling the same amount of yarn with your pointer finger each time. As you first get started, it’s best to select projects like scarves and blankets where the gauge is less important.
Related Questions
Can you crochet with a knitting needle? Unfortunately crocheting with a knitting needle is next to impossible because the hook is missing. It’s not that it cannot be done, but without the element of a hook, it’s difficult to create a crochet stitch with a knitting needle. Each stitch must be manually held to the knitting needle and pulled one by one onto the chain. This leads to poor stitch quality and is incredibly slow. The finger motions are also awkward and over time could lead to some very sore hands.
While a knitting needle might not be the best solution if you find yourself without a crochet hook, there are some simple options to keep your DIY project rolling.
Can you make a homemade crochet hook? If finger crochet does not seem to fit your project and you are committed to using a hook, there are some make-shift solutions that might help carry you over until you can find the right crochet hook for your project. Try using household objects like chopsticks or a toothbrush to create a hook. Using the sharpened end of a pencil is another option to create a crochet hook using DIY materials.